> ## Documentation Index
> Fetch the complete documentation index at: https://docs.brightdata.com/llms.txt
> Use this file to discover all available pages before exploring further.
# How to configure your Residential proxy
> Configure Bright Data Residential proxies (400M+ residential IPs): IP types, geolocation targeting, long-session peers, sticky IP duration and rotation.
Start by going to the configuration tab of the proxy you want to configure.
## Which proxy type to choose
**Choose one of four Proxy types (IPs types) for your proxy zone:**
Rotating **IPv4** proxies worldwide, of real devices, worldwide.
A combined pool or rotating **IPv4 & IPv6** proxies of real devices, worldwide.
Our "Mega Pool".
Rotating **IPv6** proxies worldwide, of real devices, worldwide.
Sets of proxies with exclusive access to a set of specific domains, with minimal to no rotation at all.
***
## Selecting the right Residential proxies
We offer 4 types of proxies on our Residential proxy netowrk:
Shared proxies:
1. Shared IPv4
2. Shared IPv4+IPv6 ("Mega pool")
3. Shared IPv6
Dedicated proxies:
4. Dedicated residential proxies
## Residential network access
Access to the Residential network requires KYC approval by the Bright Data compliance team and is available to verified companies only. This applies to every Residential proxy type, including shared, IPv6 and dedicated. For more information, see the [Residential network access policy](/proxy-networks/residential/network-access).
## Configuring Residential shared proxies (Rotating proxies)
Bright data will automatically assign a new proxy for each of your requests. You can control the behavior of the shared proxies as well as rotation using control panel settings and proxy options which are relayed in the proxy username parameter.
Most common setup is the Geolocation targeting allowing you to route your requests via proxies in specified location. You can select a default location - which will route all requests thru specific locations via our control panel.
Best practice: set up a separate residential proxy zone, for each geolocation you wish to target.
### Geolocation resolution options
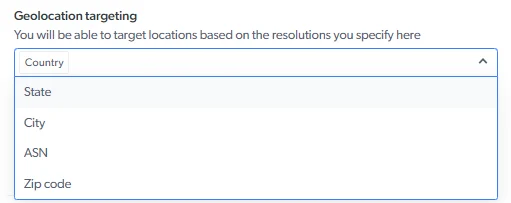
Geolocation targeting allows you to target specific locations based on `country`,`city`, `state`, `zip code`, or `ASN`. Select the resolution from the drop-down menu in your geolocation settings:
 ### Shared pool default countries' selection
When selecting countries in shared pool configuration, we will assign proxies only from the locations you select. You can select none (which means we will assign the next random proxy from the pool), one or more countries. [Read more...](/api-reference/proxy/geolocation-targeting#default-countries-selection)
You can override the default selection or explicitly assign a specific country for your peer during rotation, use the flag `-country` in the proxy user name parameter with an ISO-3166 country code.
[FAQ: Where can I see the list of country codes?](/general/faqs#where-can-i-see-the-list-of-country-codes)
***
## How to configure IPv4+IPv6 Shared residential proxies: "Mega Pool"
### Introduction: IPv6
Bright Data now supports IPv6 on its residential network. Setup and use of IPv6 proxies is very similar to IPv4 proxies.
IPv6 (Internet Protocol version 6) is the most recent version of the Internet Protocol, designed to replace IPv4. It was developed to address the limitations of IPv4, particularly the exhaustion of available IP addresses. While IPv4 uses 32-bit addresses (allowing for about 4.3 billion unique IPs), IPv6 uses 128-bit addresses, enabling a virtually unlimited number of unique IP addresses, over 340 undecillion (3.4×10³⁸).
What types of IPv6 Residential pools do we offer?
Bright data offers two types of residential pools with IPv6 proxies:
1. Combined IPv4+IPv6: also called "Mega Pool", of shared rotating proxies
2. IPv6 only shared rotating proxies
Bright Data currently does not offer IPv6 proxies in Datacenter or ISP networks.
### How big is IPv6 residential network?
We now support IPv6 on our worldwide reliable residential proxy network. Approximately 150,000 peers are available, with new ones joining every week. The proxies are collated in our “rotating shared pool” of residential proxies.
### What is IPv6 Access Policy?
IPv6 proxies follow the [Residential network access policy](/proxy-networks/residential/network-access). They are available only to KYC-verified companies that are eligible to use this protocol over the Residential network.
### Which options of Bright Data residential IPv6 proxies can I use?
All our IPv4 options are supported, except the list below:
| Targeting Option | Description |
| :--------------- | :--------------------------------------------------- |
| `gip` | No selected gIP targeting (group of residential IPs) |
| `asn` | No ASN targeting |
| `zip` | No ZIP code targeting |
| `ip` | No explicit IP targeting |
| `carrier` | No mobile carrier targeting |
| `os` | No explicit operating system targeting |
If you chose to relay those in your proxy username and your zone was set to IPv6, we will ignore them and process the request.
Full list of options can be found here: [https://docs.brightdata.com/proxy-networks/config-options](https://docs.brightdata.com/proxy-networks/config-options)
### What happens if I target IPv4 only host with IPv6 proxy?
If you choose to target with IPv6 proxy an IPv4 only domain, which do not have an IPv6 address, your request will result in HTTP error 502, with Bright Data error header (x-brd-err-code): `target_40011`. You should retry the request with IPv4 proxy.
Full list of errors can be seen in our catalog, together with target\_40011 here: [https://docs.brightdata.com/proxy-networks/errorCatalog#target-40011](https://docs.brightdata.com/proxy-networks/errorCatalog#target-40011)
### Can I switching zone from IPv4 to IPv6 and vice versa?
Yes. You can switch the zone from IPv4 to IPv6 and vice versa without any limitation. Once protocol version is chosen, it will impact all the proxies assigned to this zone and the selected protocol proxies will be assigned to relay your requests.
### Does the price of IPv6 traffic changes?
IPv6 traffic is currently charged at the same rate as IPv4. In your bill we will calculate how much traffic was relayed by which protocol version and charge accordingly. You can switch your zone between IPv6 and IPv4 - Bright Data will calculate the traffic and bill accordingly.
### Is there any change in access details or proxy credentials for IPv6?
No. All access details and credentials are identical to IPv4: Host, port, username and password remain the same. If you provide a username with parameters which are not supported in IPv6 (listed above) they will be ignored.
### Can I use IPv6 to access Bright Data proxy services?
No. We do not allow IPv6 to access our own proxy gateway: your accessing scraper or utility must connect to Bright Data using IPv4. Attempting to access with IPv6 will result in error. The error will be DNS related error stating that domain [brd.superproxy.io](http://brd.superproxy.io) could not be resolved.
Example with curl call:
```sh theme={null}
curl -i --proxy brd.superproxy.io:44445 --proxy-user brd-customer-*******-zone-residential_proxy21:********** "https://geo.brdtest.com/welcome.txt?product=resi&method=native" -g -6
```
Response error:
```sh theme={null}
curl: (5) Could not resolve proxy: [brd.superproxy.io](http://brd.superproxy.io)
```
#### Do I need to define allowlist and denylist in IPv6?
No. Allowlist (whitelist) and denylist (blacklist) refer to the IP addresses you use to connect to Bright Data proxy services. Since we allow only IPv4 to connect to our proxy service from your side, settings remain in IPv4 even if the zone is IPv6. Those lists determine which IPs can/cannot send requests to the zone and remain as IPv4 IPs and ranges.
## Configuring dedicated residential proxies access
Dedicated Residential proxies are available **only** after KYC approval by the Bright Data compliance team. Until your account is KYC-verified, the **Dedicated** option stays **disabled** in the control panel. For details, see the [Residential network access policy](/proxy-networks/residential/network-access).
To create a dedicated Residential zone via API, see the [Dedicated Residential (gIP) zone example in Add a zone](/api-reference/account-management-api/Add_a_Zone#dedicated-residential-gip-zone).
### IP Groups `gIPs`
Only works with the **Dedicated** option
`gIP` contains between 6-90 IPs at any given moment while sharing the same attributes, targeting the selected dedicated domains within the zone "Configuration" section. `gIPs` are used by Bright Data to create a single identifier for this group of proxies (with distinct IP addresses). Those proxies will be used explicitly by you towards the domains you target.
### Shared pool default countries' selection
When selecting countries in shared pool configuration, we will assign proxies only from the locations you select. You can select none (which means we will assign the next random proxy from the pool), one or more countries. [Read more...](/api-reference/proxy/geolocation-targeting#default-countries-selection)
You can override the default selection or explicitly assign a specific country for your peer during rotation, use the flag `-country` in the proxy user name parameter with an ISO-3166 country code.
[FAQ: Where can I see the list of country codes?](/general/faqs#where-can-i-see-the-list-of-country-codes)
***
## How to configure IPv4+IPv6 Shared residential proxies: "Mega Pool"
### Introduction: IPv6
Bright Data now supports IPv6 on its residential network. Setup and use of IPv6 proxies is very similar to IPv4 proxies.
IPv6 (Internet Protocol version 6) is the most recent version of the Internet Protocol, designed to replace IPv4. It was developed to address the limitations of IPv4, particularly the exhaustion of available IP addresses. While IPv4 uses 32-bit addresses (allowing for about 4.3 billion unique IPs), IPv6 uses 128-bit addresses, enabling a virtually unlimited number of unique IP addresses, over 340 undecillion (3.4×10³⁸).
What types of IPv6 Residential pools do we offer?
Bright data offers two types of residential pools with IPv6 proxies:
1. Combined IPv4+IPv6: also called "Mega Pool", of shared rotating proxies
2. IPv6 only shared rotating proxies
Bright Data currently does not offer IPv6 proxies in Datacenter or ISP networks.
### How big is IPv6 residential network?
We now support IPv6 on our worldwide reliable residential proxy network. Approximately 150,000 peers are available, with new ones joining every week. The proxies are collated in our “rotating shared pool” of residential proxies.
### What is IPv6 Access Policy?
IPv6 proxies follow the [Residential network access policy](/proxy-networks/residential/network-access). They are available only to KYC-verified companies that are eligible to use this protocol over the Residential network.
### Which options of Bright Data residential IPv6 proxies can I use?
All our IPv4 options are supported, except the list below:
| Targeting Option | Description |
| :--------------- | :--------------------------------------------------- |
| `gip` | No selected gIP targeting (group of residential IPs) |
| `asn` | No ASN targeting |
| `zip` | No ZIP code targeting |
| `ip` | No explicit IP targeting |
| `carrier` | No mobile carrier targeting |
| `os` | No explicit operating system targeting |
If you chose to relay those in your proxy username and your zone was set to IPv6, we will ignore them and process the request.
Full list of options can be found here: [https://docs.brightdata.com/proxy-networks/config-options](https://docs.brightdata.com/proxy-networks/config-options)
### What happens if I target IPv4 only host with IPv6 proxy?
If you choose to target with IPv6 proxy an IPv4 only domain, which do not have an IPv6 address, your request will result in HTTP error 502, with Bright Data error header (x-brd-err-code): `target_40011`. You should retry the request with IPv4 proxy.
Full list of errors can be seen in our catalog, together with target\_40011 here: [https://docs.brightdata.com/proxy-networks/errorCatalog#target-40011](https://docs.brightdata.com/proxy-networks/errorCatalog#target-40011)
### Can I switching zone from IPv4 to IPv6 and vice versa?
Yes. You can switch the zone from IPv4 to IPv6 and vice versa without any limitation. Once protocol version is chosen, it will impact all the proxies assigned to this zone and the selected protocol proxies will be assigned to relay your requests.
### Does the price of IPv6 traffic changes?
IPv6 traffic is currently charged at the same rate as IPv4. In your bill we will calculate how much traffic was relayed by which protocol version and charge accordingly. You can switch your zone between IPv6 and IPv4 - Bright Data will calculate the traffic and bill accordingly.
### Is there any change in access details or proxy credentials for IPv6?
No. All access details and credentials are identical to IPv4: Host, port, username and password remain the same. If you provide a username with parameters which are not supported in IPv6 (listed above) they will be ignored.
### Can I use IPv6 to access Bright Data proxy services?
No. We do not allow IPv6 to access our own proxy gateway: your accessing scraper or utility must connect to Bright Data using IPv4. Attempting to access with IPv6 will result in error. The error will be DNS related error stating that domain [brd.superproxy.io](http://brd.superproxy.io) could not be resolved.
Example with curl call:
```sh theme={null}
curl -i --proxy brd.superproxy.io:44445 --proxy-user brd-customer-*******-zone-residential_proxy21:********** "https://geo.brdtest.com/welcome.txt?product=resi&method=native" -g -6
```
Response error:
```sh theme={null}
curl: (5) Could not resolve proxy: [brd.superproxy.io](http://brd.superproxy.io)
```
#### Do I need to define allowlist and denylist in IPv6?
No. Allowlist (whitelist) and denylist (blacklist) refer to the IP addresses you use to connect to Bright Data proxy services. Since we allow only IPv4 to connect to our proxy service from your side, settings remain in IPv4 even if the zone is IPv6. Those lists determine which IPs can/cannot send requests to the zone and remain as IPv4 IPs and ranges.
## Configuring dedicated residential proxies access
Dedicated Residential proxies are available **only** after KYC approval by the Bright Data compliance team. Until your account is KYC-verified, the **Dedicated** option stays **disabled** in the control panel. For details, see the [Residential network access policy](/proxy-networks/residential/network-access).
To create a dedicated Residential zone via API, see the [Dedicated Residential (gIP) zone example in Add a zone](/api-reference/account-management-api/Add_a_Zone#dedicated-residential-gip-zone).
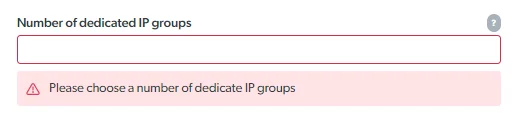
### IP Groups `gIPs`
Only works with the **Dedicated** option
`gIP` contains between 6-90 IPs at any given moment while sharing the same attributes, targeting the selected dedicated domains within the zone "Configuration" section. `gIPs` are used by Bright Data to create a single identifier for this group of proxies (with distinct IP addresses). Those proxies will be used explicitly by you towards the domains you target.
 ***
### How to set dedicated domains
Only works with the **Dedicated** option
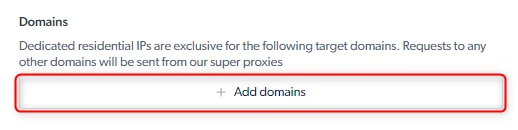
Define the domains you'd like your proxies to be exclusive to. Every request to a domain in this list is served thru your dedicated proxies exclusively. No one else is allowed to target those domains via your dedicated proxies. You can use this zone for requests to other target domains, yet those requests will be served thru our datacenter hosted Bright Data proxies.
For example: if in the list you have two domains: a.com and b.com, every request to a.com and b.com are routed thru your dedicated proxies, request to c.com is routed thru our datacenter hosted proxy. Requests to a.com and b.com from others will **never** go thru your dedicated proxies.
***
### How to set dedicated domains
Only works with the **Dedicated** option
Define the domains you'd like your proxies to be exclusive to. Every request to a domain in this list is served thru your dedicated proxies exclusively. No one else is allowed to target those domains via your dedicated proxies. You can use this zone for requests to other target domains, yet those requests will be served thru our datacenter hosted Bright Data proxies.
For example: if in the list you have two domains: a.com and b.com, every request to a.com and b.com are routed thru your dedicated proxies, request to c.com is routed thru our datacenter hosted proxy. Requests to a.com and b.com from others will **never** go thru your dedicated proxies.
 ***
## How to configure advanced options
### Automatic failover for unavailable peers
In case we cannot reach the proxy peer for your request, we will route the request to another available peer. Automatic failover does not apply when you choose default countries: if we cannot find a peer in the country you selected, we will fail the request with error.
Enabling automatic failover assures execution of the request, regardless of the availability of a specific peer.
#### Automatic failover when accessing target website which does not publish IPv6 address with IPv6 proxy
To ensure continuity, we enable IPv6 to IPv4 automatic failover, which you can configure in the zone's advanced settings to either on or off (default: `ON`).
When toggled "On" (default), in case your target website does not publish an IPv6 address, we will route the request via an available IPv4 proxy in the same location. If this toggle is not enabled, trying to access a target host without IPv6 address will result in an error: [https://docs.brightdata.com/proxy-networks/errorCatalog#target-40011](https://docs.brightdata.com/proxy-networks/errorCatalog#target-40011)
***
### Special Ports & Protocols
Ports `80` and `443` are available by default, supporting HTTP and HTTPS & SOCKS5 protocols. We also support all ports over `1024` in our Datacenter proxy network. [Read more on ports and protocols...](/proxy-networks/faqs#how-to-see-supported-ports-and-protocols)
Bright Data can support additional ports by request. A dedicated and additional compliance process with the Bright Data compliance team will follow every request to support a new port.
If you would like additional port permissions, you can contact Bright Data Support.
Examples of ports that require Bright Data compliance review before activation:
| Port | Protocol |
| ---- | -------- |
| `70` | HTTP |
| `98` | HTTPS |
### Zone usage limit
A zone usage limit is an optional cap you set on a Residential proxy zone so it cannot consume more than a fixed amount of spending or traffic. Use it to keep a single zone inside a known budget and bandwidth envelope, which matters most on rotating shared pool proxies where consumption scales with request volume.
You can cap a zone in one of two ways:
* **Spending limit:** cap the amount the zone is allowed to spend.
* **Traffic limit:** cap the amount of bandwidth the zone is allowed to use.
#### When to use a spending limit vs a traffic limit
* Choose a **spending limit** when your priority is cost control and you want a hard ceiling on what a zone can bill.
* Choose a **traffic limit** when your priority is bandwidth control, for example to stop one project or zone from exhausting a shared bandwidth allocation.
#### How to set a zone usage limit
Set a usage limit from the proxy page:
1. Open the [My proxies](https://brightdata.com/cp/zones) page.
2. Click the proxy you want to limit.
3. Open the **Access parameters** tab.
4. Scroll to **Limit** (the default is unlimited).
5. Click **edit**.
6. Enable the spend or traffic limit.
7. Set the limit you want by choosing one of: `$/day`, `$/month`, `bytes/day` or `bytes/month`.
8. Click **update**.
When the limit is reached, the zone can be suspended, alerted or both, depending on your configuration. The limit is checked every 15 minutes, so it may not take effect immediately. If traffic is high, usage stats can lag. You can recalculate them from the zone's **Statistics** table using the **recalc** button.
To see how much a zone is consuming against its limit, review your zone usage in the dashboard. For more detail, see [Usage monitoring](/general/usage-monitoring/Usage) and the [bandwidth usage limits FAQ](/general/faqs). For background on bandwidth fairness on shared pools, see [Fair use allowance](/general/usage-monitoring/fair_use_allowance).
***
## How to configure advanced options
### Automatic failover for unavailable peers
In case we cannot reach the proxy peer for your request, we will route the request to another available peer. Automatic failover does not apply when you choose default countries: if we cannot find a peer in the country you selected, we will fail the request with error.
Enabling automatic failover assures execution of the request, regardless of the availability of a specific peer.
#### Automatic failover when accessing target website which does not publish IPv6 address with IPv6 proxy
To ensure continuity, we enable IPv6 to IPv4 automatic failover, which you can configure in the zone's advanced settings to either on or off (default: `ON`).
When toggled "On" (default), in case your target website does not publish an IPv6 address, we will route the request via an available IPv4 proxy in the same location. If this toggle is not enabled, trying to access a target host without IPv6 address will result in an error: [https://docs.brightdata.com/proxy-networks/errorCatalog#target-40011](https://docs.brightdata.com/proxy-networks/errorCatalog#target-40011)
***
### Special Ports & Protocols
Ports `80` and `443` are available by default, supporting HTTP and HTTPS & SOCKS5 protocols. We also support all ports over `1024` in our Datacenter proxy network. [Read more on ports and protocols...](/proxy-networks/faqs#how-to-see-supported-ports-and-protocols)
Bright Data can support additional ports by request. A dedicated and additional compliance process with the Bright Data compliance team will follow every request to support a new port.
If you would like additional port permissions, you can contact Bright Data Support.
Examples of ports that require Bright Data compliance review before activation:
| Port | Protocol |
| ---- | -------- |
| `70` | HTTP |
| `98` | HTTPS |
### Zone usage limit
A zone usage limit is an optional cap you set on a Residential proxy zone so it cannot consume more than a fixed amount of spending or traffic. Use it to keep a single zone inside a known budget and bandwidth envelope, which matters most on rotating shared pool proxies where consumption scales with request volume.
You can cap a zone in one of two ways:
* **Spending limit:** cap the amount the zone is allowed to spend.
* **Traffic limit:** cap the amount of bandwidth the zone is allowed to use.
#### When to use a spending limit vs a traffic limit
* Choose a **spending limit** when your priority is cost control and you want a hard ceiling on what a zone can bill.
* Choose a **traffic limit** when your priority is bandwidth control, for example to stop one project or zone from exhausting a shared bandwidth allocation.
#### How to set a zone usage limit
Set a usage limit from the proxy page:
1. Open the [My proxies](https://brightdata.com/cp/zones) page.
2. Click the proxy you want to limit.
3. Open the **Access parameters** tab.
4. Scroll to **Limit** (the default is unlimited).
5. Click **edit**.
6. Enable the spend or traffic limit.
7. Set the limit you want by choosing one of: `$/day`, `$/month`, `bytes/day` or `bytes/month`.
8. Click **update**.
When the limit is reached, the zone can be suspended, alerted or both, depending on your configuration. The limit is checked every 15 minutes, so it may not take effect immediately. If traffic is high, usage stats can lag. You can recalculate them from the zone's **Statistics** table using the **recalc** button.
To see how much a zone is consuming against its limit, review your zone usage in the dashboard. For more detail, see [Usage monitoring](/general/usage-monitoring/Usage) and the [bandwidth usage limits FAQ](/general/faqs). For background on bandwidth fairness on shared pools, see [Fair use allowance](/general/usage-monitoring/fair_use_allowance).