> ## Documentation Index
> Fetch the complete documentation index at: https://docs.brightdata.com/llms.txt
> Use this file to discover all available pages before exploring further.
# Create your first Residential proxy
> Set up your first Bright Data Residential proxy: sign in, create a proxy in the Control Panel, verify your account and earn $5 credit for first-time setup.
**Verify your account and get \$5 credit**
Add a payment method to verify your account and receive a \$5 credit. You won’t be charged at this stage.
**Residential proxies require a KYC-verified business account.** Access is granted only after the Bright Data compliance team reviews and approves your KYC, so a new Residential zone stays disabled until then. Start at [KYC verification](https://brightdata.com/cp/kyc) and see the [Residential network access policy](/proxy-networks/residential/network-access). No KYC yet? Use [ISP proxies](/proxy-networks/isp/introduction) or [Datacenter proxies](/proxy-networks/data-center/introduction), which need no KYC.
Sign in to Bright Data} />
Open the Create Proxy page}>
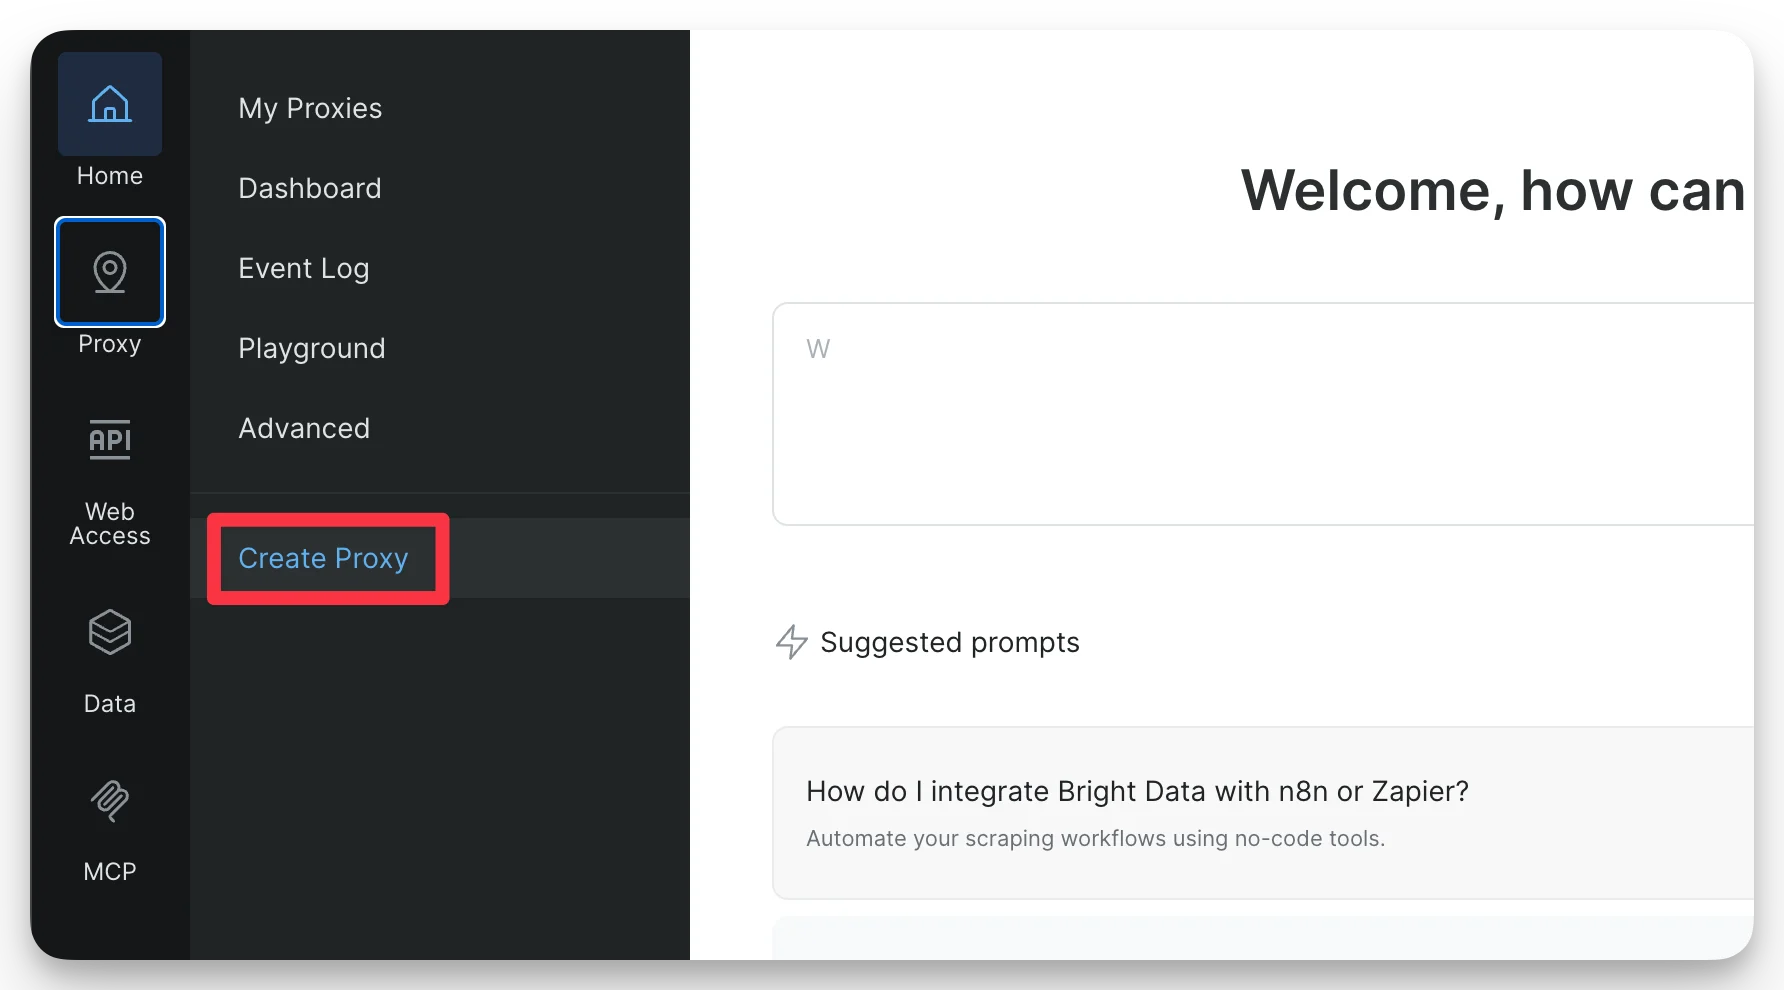
Navigate to **Create Proxy** under the **Proxy** section in the left menu.
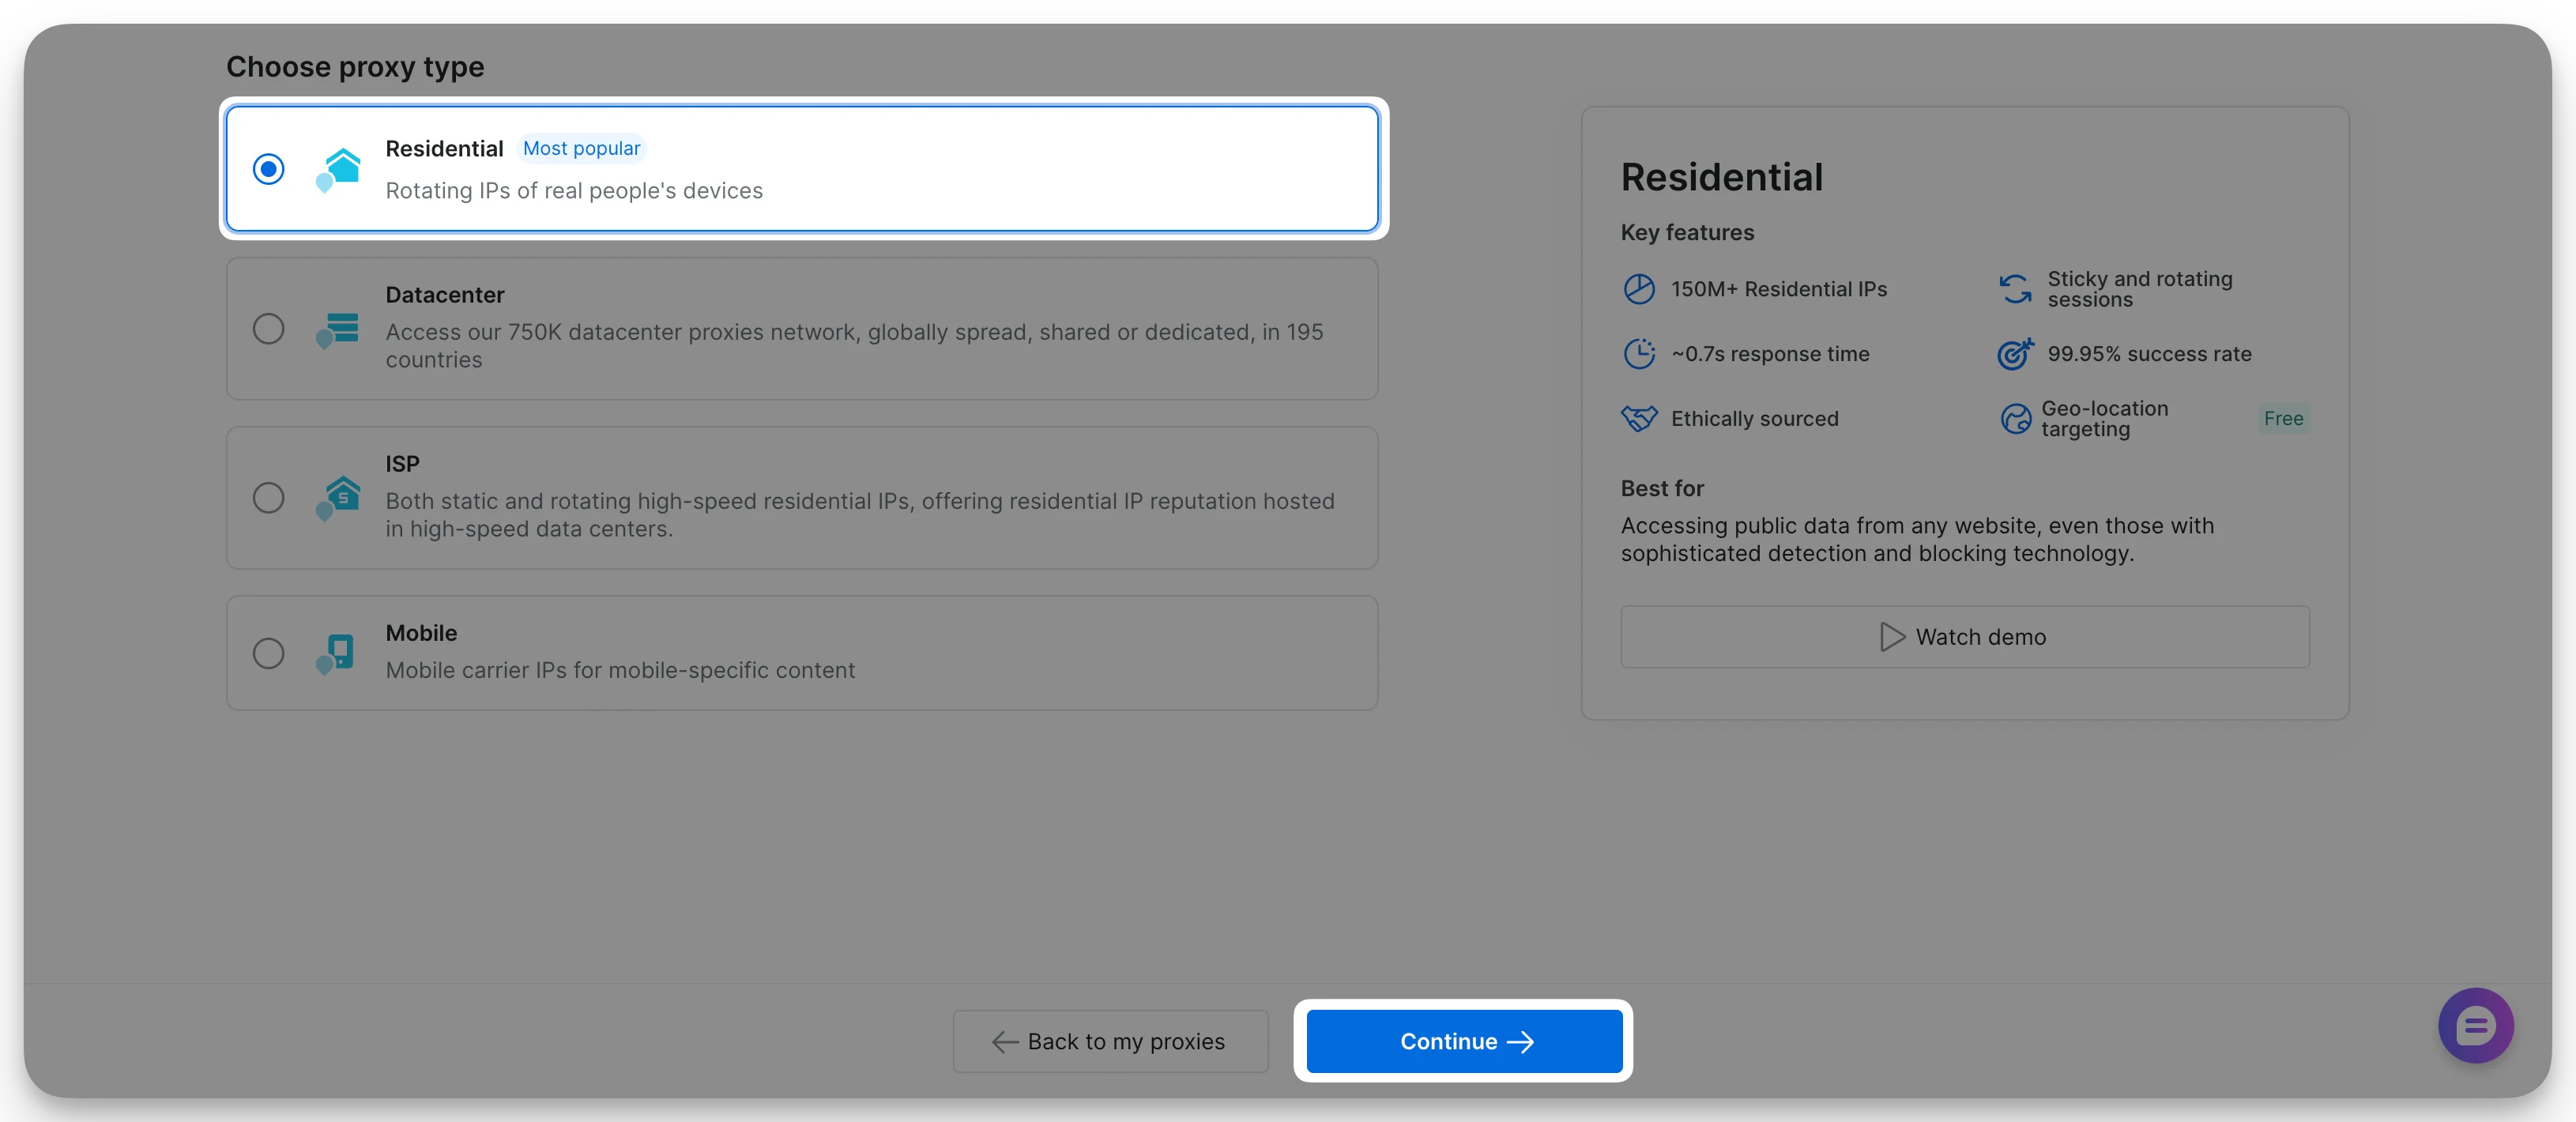
 Select **Residential Proxy** and click **Continue**.
 Enter a meaningful name. Optionally, add a short description.
**The proxy name cannot be changed once created.**
All other settings can be modified later. For details, see [Configure your Proxy](/proxy-networks/residential/configure-your-proxy).
Enter a meaningful name. Optionally, add a short description.
**The proxy name cannot be changed once created.**
All other settings can be modified later. For details, see [Configure your Proxy](/proxy-networks/residential/configure-your-proxy).
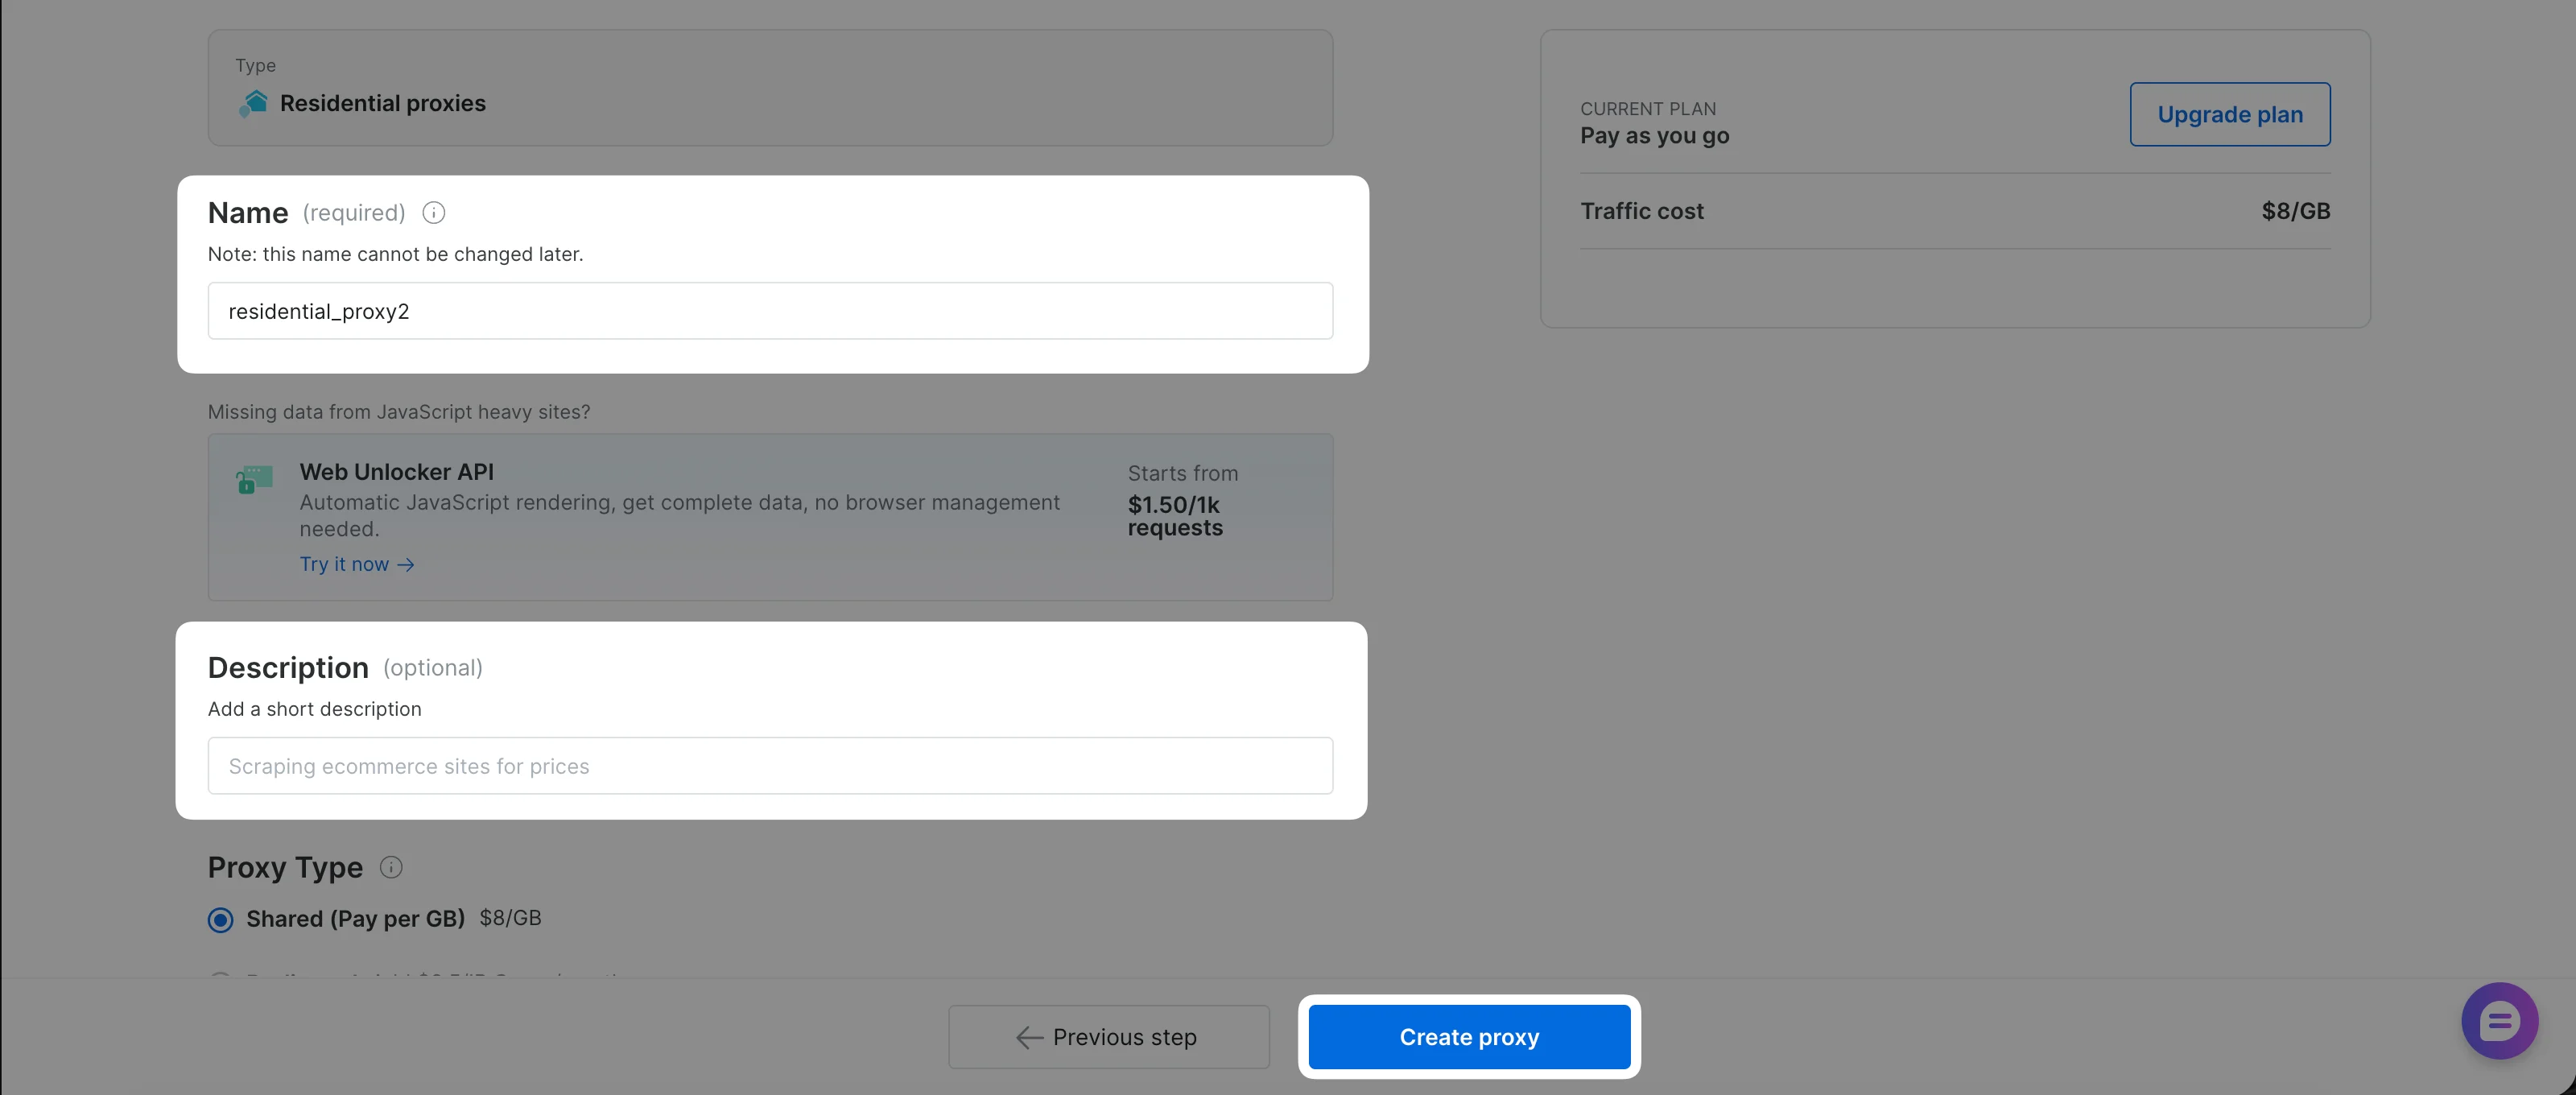 If you signed up with a personal email (e.g., Gmail, GitHub) and have not yet added a payment method, the primary button will read **Add payment method** instead of **Create Proxy**.
Click the button to open the payment verification form and complete the process. You will **not** be charged, this is for identity verification only.
Already have a payment method on file? This step is skipped automatically. For full details, see [Payment Verification](/general/account/billing-and-pricing/payment-verification).
Click **Create Proxy**. If you were redirected to add a payment method, your zone is created automatically once verification completes. Your proxy is now ready to use.
If you signed up with a personal email (e.g., Gmail, GitHub) and have not yet added a payment method, the primary button will read **Add payment method** instead of **Create Proxy**.
Click the button to open the payment verification form and complete the process. You will **not** be charged, this is for identity verification only.
Already have a payment method on file? This step is skipped automatically. For full details, see [Payment Verification](/general/account/billing-and-pricing/payment-verification).
Click **Create Proxy**. If you were redirected to add a payment method, your zone is created automatically once verification completes. Your proxy is now ready to use.